In all the recent news about our contaminated water supply, I'm very pleased to say that Boston ranks at the number five spot of cleanliest water. We could do better as 14 chemicals were found, but I'm glad to know I can feel comfortable drinking tap water and straying away from the ever eco-unfriendly bottled water.
See where your city stands!
Happy drinking (clean) water!
It's Unanimous! Nope! It's actually Nutranimous; nutrition made easy! Are you eager to learn random facts about nutrition, concerned about how your food choices affect the environment, interested in vegan/vegetarian nutrition, or in search of a quick, healthy, tasty recipe? If so, this blog is for you. All this (and more) knowing that you've stumbled upon a reliable source! Happy reading!
Sunday, January 31, 2010
Wednesday, January 27, 2010
A Little Variety is the Spice of Life
The other day I looked around my kitchen and felt as though I had random ingredients strowed about. I had a half can of black beans, a half jar of tomato sauce, about 2 tbsp of salsa, and a half bag of spinach left. I needed to use these items up quick or they'd have to be tossed. (There is absolutely no tossing of anything in my house if possible. I don't believe in waste!) What I decided to do was to slightly alter the sweet potato recipe (that I just posted about recently) and in addition add a side of spinach.
I put the sweet potato in the oven to bake (at 350 degrees for about 60 minutes.) I wasn't in the mood for a microwaved potato. If you don't already know this, there is definitely a texture difference with microwaving versus baking. The skin of the sweet potato is crunchy and fabulous after begin baked. And the best part about baking a sweet potato is the natural caramelization that occurs. A sprinkle of sweetness without added table sugar! YAY!
About 20 minutes before the potato would be done, I minced up 4 cloves of garlic (Yes. I love garlic.) and the red onion I had leftover. I sauteed that in a frying pan with olive oil. After a few minutes, I added the raw, fresh spinach and cooked until soft.
About 5 minutes before the potato would be done and while the spinach was sauteing, I poured the rest of the beans, the salsa, a splash of the tomato sauce and a few sprinkles of cumin into a small pot. I heated it until warm (and with a gas stove that is less than 5 minutes!!)
After approximately 60 minutes, the sweet potato was fully cooked. I took it out of the oven and let it cool just for a minute or two. Then, I placed it on my dinner plate, sliced it down the center, and topped it with the bean mixture and a sprinkle of cilantro! Finally, the spinach was plated to the side of the potato and VOILA!!! Dinner in a pinch with a little variation from last week's creation and with minimal preparation! Yay!
I have to admit I was a little nervous to add red onions (using white onions would not have made me question a thing) to the spinach. In the end, it was a great risk that turned out in my favor as the dish was surprisingly, wonderfully delicious and palatable!! Enjoy!
Monday, January 25, 2010
Pie Day Celebration!
Saturday January 23rd was National Pie Day!! To celebrate the day I (not surprisingly) baked a pie!! :) I wanted to use ingredients that were in season, which I have to admit is a little challenging when all I wanted was a fruit pie in mid-January (in Boston.) Luckily for me, months ago I tossed a bag of cranberries in the freezer! And happily I was able to make a very tasty pie and share among friends. I made a cranberry pear pie with walnut crumble topping. See original recipe here and my own methods and styles below.
Cranberry Pear Pie with Walnut Crumble Topping
Preparation: 2o minutes
Baking Time: 1 hour
Ingredients:
1 pie crust
2 tbsp all-purpose flour
1/2 cup maple syrup
2 tbsp butter, melted
2 large pears, sliced
1 cup frozen cranberries
Topping Ingredients:
1/2 cup all-purpose flour
1/4 cup brown sugar, packed
1 tsp ground cinnamon
1/3 cup cold butter, cubed
1/2 cup chopped walnuts
Instructions and Comments:
I love making homemade pie crusts. There's something scientifically entertaining and exciting about trying to get the proportions of the ingredients just right in-order to have that most amazing melt in your mouth pie crust experience; howwwwever, reality also sometimes smacks me in the face taunting me with my not-so-always realistic goals. I too fall into the bunch of people who I don't have enough time... Needless to say, I succumbed to reality and bought a pre-made pie crust. I went into my local Whole Food's Market and bought the cheapest ready-to-go pie crust. And honestly, in a time crunch, this is the way to go! No hassle. No mess. As an added bonus, the frozen pie crust can sit pretty in the freezer until you're ready to pour in the fruit filling and bake.
First, begin by preheating your oven to 400 degrees. Second, start slicing the pears. I used 3 large green Anjou pears! Of note, I had too much filling for one pie. If you don't want extras, just use 2 large pears. On the other hand, I poured the extra filling into a pyrex dish and baked along with the pie. Two desserts with no extra effort! Yay!
Moving on, slice the pear long ways. Remove core. Slice remaining pear length-wise. Combine cranberries and sliced pears in one large bowl. In a small bowl combine all-purpose flour, maple syrup and melted butter. Pour liquid mixture over fruit mixture and toss to coat. Spoon into pie crust. Of note, I used over the counter reduced sugar (actually made with sugar NOT HFCS!) syrup. (But, we won't talk about the natural colorings that are in it...) I would have preferred to use my locally made organic maple syrup, but I ran out! (Tear!) So whatever you have in the kitchen cabinet will suffice! Promise!
In a medium bowl mix together the topping ingredients of all-purpose flour, brown sugar, ground cinnamon, and walnuts. Cut in butter until crumbly. Sprinkle over pie.
Before baking the pie cover the edges of the crust with tinfoil to prevent burning.
Bake at 400 degrees for 15 minutes. Remove tinfoil and bake pie at 350 degrees for about 40 additional minutes or until crust is golden brown. Remove from oven, let cool, and indulge! :)
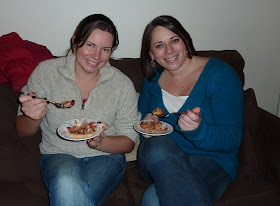
The best part about Pie Day is not only baking a pie, but sharing it with good friends!! Hope you had a lovely Pie Day! I did!
Saturday, January 23, 2010
Spaghetti Squash Casserole
I always walk by and stare at the spaghetti squash sitting on the shelf at the market waiting, wanting to be bought, but I never really know what to do with it other than bake or boil it. I looked around for some recipes on the net, but never came across anything spectacular. So what did I do? (What do you think?! :)) I decided to make up my own recipe. I picked apart various recipes I found and decided to mush them all together into one creation! The preparation is a bit tedious, but other than that, it's a piece of cake! (Sadly, not literally. Maye another day it'll be a piece of cake I eloquently, tastefully blog about!!)
Spaghetti Squash Casserole
Preparation Time: 1 hour
Cook Time: 60 minutes
Ingredients:
1 spaghetti squash
1 small onion, chopped
chopped fresh basil
1 cup low fat cottage cheese
2 tbsp dried parsley
1/4 cup grated Parmesan cheese
1 tbsp vegetable oil
2 cloves garlic, chopped
2 plum tomatoes, chopped
1/2 cup low fat shredded mozzerella cheese
8oz mushrooms
1 small head of broccoli, chopped
Directions:
1. Cut the spaghetti squash lengthwise and remove seeds
2. Place squash face down in a baking pan. Add water so it is about an inch deep.
3. Bake in (preheated) oven at 350 degrees for 45 minutes.
4. While the squash is baking, chop the onion, mushrooms, tomatoes, and broccoli.
5. Heat oil in a skillet over medium heat. Add garlic.
6. After a minute or two of pan frying garlic in oil, add onions. Cook for a few minutes, then add mushrooms. When the onions and mushrooms are almost fully cooked (and soft), add the basil, tomatoes and broccoli. Cook just a few minutes until tomatoes and broccoli are warm. Of note, broccoli does not need to fully cook (and it shouldn't) because it will continue baking in the oven.
7. Remove mixture from heat and set aside.
8. In a large bowl, mix cottage cheese, mozzarella cheese, and parsley together.
9. At this point, the squash should be done. Remove from oven and let cool just long enough where you can handle it. Scrape out squash from its shell into the bowl with the cheese. It's stringy and looks like... spaghetti! Stir squash and cheese mixture together.
10. Drain excess liquid from vegetable mixture before combining with squash and cheese mixture.
11. Poor into baking dish.
12. Bake at 400 degrees for 60 minutes.
13. Let cool for a few minutes. Dish individual portions and enjoy!
Burger King Offers Gluten Sensitive Menu
Burger King recently released information that they would now be providing a gluten sensitive menu. See press release. Although the foods they are offering (to include apples, french fries, and salad) are gluten free (and have always been gluten free), my concern was one of cross contamination. I think the importance of avoiding cross contamination is often overlooked. When a gluten free product comes in contact with a gluten product, the gluten free product is no longer gluten free. For example, if you take (gluten free) french fries and put them in the fryer where chicken fingers were just fried, those french fries are now no longer gluten free. (Chicken is also gluten free, but the bread crumbs are not!) So as many news articles and blogs were popping up across the internet, I decided to email the BK RD to clarify if the menu was gluten free. Her response is below.
The Gluten Sensitive List is meant to be a guide for our guests with gluten sensitivity, providing foods and ingredients on the BURGER KING® restaurant menu in the U.S. that do not contain wheat, barley, oats or rye. The Gluten Sensitive List is not intended for people with severe gluten intolerance.
The information on the Gluten Sensitive List is based on suppliers' ingredient lists and is as complete as possible at the time of publication (December 2009). However, actual gluten content of these foods and ingredients may vary, depending upon the supplier, product handling, and each restaurant's food preparation practices.
Therefore, those people who have Celiac Disease where a 100% gluten free diet is necessary to maintain a healthy life and avoid malnutrition, BK's gluten sensitive menu choices are likely not a good choice.Wednesday, January 20, 2010
Get Ready for Pie Day!!
Saturday January 23rd is National PIE Day (not to be confused with PI day!)
Stumped on how to celebrate pie day?! Don't be. Check out this site!
Happy indulging! :)
Stumped on how to celebrate pie day?! Don't be. Check out this site!
Happy indulging! :)
Monday, January 18, 2010
Mango Delight
Not all desserts have to be high calorie, high fat, and high sugar. I don't know about you, but sometimes I just want a little something sweet after dinner. Something little, not something extravagant, artery clogging, and waist bulging! Somewhere I saw a recipe for a dessert to include sorbet and yogurt. I took that idea and came up with my own little twist.
Mango Delight
1/2 cup mango sorbet
1/2 cup low-fat plain yogurt
blueberries
Scoop the sorbet into a bowl. Spoon out the yogurt. Sprinkle the berries on top. Voila! Dessert in a pinch! And without the worries of arteries clogging and waists bulging! Enjoy!
Of note, the beauty of this recipe is that it is so simple. If you don't like mango sorbet, substitute for raspberry. If you don't like plain yogurt, try vanilla yogurt. I might not go with blueberries on a rapsberry sorbet (or maybe I would), but one might try kiwi instead. The road is neverending. Experiment. See what you suits your fancy! :)
Sunday, January 17, 2010
Spinach-Quinoa Salad with Cherries and Almonds
If you are a lover of quinoa, or even if you aren't, this is a must-try recipe. This is my new favorite recipe because the dish explodes with flavor with every single bite you take. It's a very light dish, which might be recommended for the warmer months; however, during this cold month of January I thoroughly enjoyed it. Perhaps it's just that dish I need to forget about the cold temperatures outside!
Spinach-Quinoa Salad with Cherries and Almonds
Courtsey of Vegetarian Times
Ingredient List
Serves 4-6 (Four servings if this is your main dish; six if it's just a side dish.)
1/4 cup sliced almonds
1.5 cups quinoa
2 cups spinach leaves
2 cups fresh cherries (pitted and halved) OR 1 cup dried cherries (chopped)
1 cucumber (peeled and chopped)
1 small red onion (finely chopped)
1/4 cup plain low-fat yogurt
1 tbsp olive oil
2 tbsp lemon juice
3 cloves garlic (minced)
Directions
1. Preheat oven to 350 degrees. Spread almonds on a baking sheet and toast until golden brown. (Of note, baking time will likely vary. My almonds toasted in 4 minutes. The original recipe estimated 7 to 10 minutes.)
2. Boil 3 cups of water. Stir in quinoa. Reduce heat to medium, cover, and simmer (approximately 20 minutes) until the liquid has been absorbed.
3. Remove from heat and let cool.
4. Lay 5 or 6 spinach leaves flat on top of each other. Roll tightly into a cylinder and slice into slivers. Repeat with remaining spinach.
5. Mix quinoa, almonds, spinach, cherries, cucumber, and red onion in large bowl. In another smaller bowl mix together yogurt, olive oil, lemon juice, and garlic using a whisk. Pour over salad and toss gently. Add salt and pepper to your tastes. Chill 30 minutes to allow flavors to develop before serving.
Comments
Just a note of caution. This recipe requires a bit of preparation if you don't buy pre-chopped ingredients. I spent 30 to 45 minutes chopping. For me, I don't mind. Isn't that truly the art of cooking anyway?! :) But, for all of those in a time crunch you can either pre-chop the day before or just buy pre-chopped ingredients.
Rolling the spinach and cutting it is fun! I felt like I was back in elementary school in art class. I'm not sure why. Maybe it's because the spinach looks like confetti to me!
Since it is NOT cherry season (and I fully believe trying to consume seasonal fruits and vegetables the majority of the time!), I used dried cherries. It adds a little sweetness to this dish that I fully enjoyed.
The original recipe called for TWO things I did not do. I did not remove the seeds from my cucumber. (Isn't that just waste anyway? In all seriousness, seeds can take away from a dish such as the Raita dish I posted months ago; however, in this dish I feel as the seeds do no harm.) I also did not include one 15oz can of chickpeas. I actually think chickpeas would directly compete with the flavors of quinoa and make it less than the amazing dish it currently is.
In regards to the dressing, I used only 1 tbsp of oil although the original recipe called for 3 tbsp. Next time around I think I will increase the yogurt to 1/2 cup and then subsequently increase the oil to 2 tbsp. I also love garlic so I used 3 cloves and not 2 that the original recipe called for. I actually think next time I might even up that to 4 cloves!! (FYI. You might wanna pass on the smooching for the night!) Finally, I think this recipe does not need extra salt or pepper. There are so many wonderful flavors from each ingredient itself! Give it a try! You won't be disappointed!!
Thursday, January 14, 2010
Sweet Potato Bean!
I randomly stumbled up on this recipe! Delicious! I have to admit I was skeptical at first. When I think of sweet potatoes, I don't think of black beans (or visa versa.) I realized I had little to lose since I love both black beans and sweet potatoes (as well as tomatoes and cumin.) My dance with the unknown worked in my favor; this is my new favorite side-dish. (Yes, until tomorrow and I discover my next new favorite!)
Place sweet potato(es) in the microwave for about 4 minutes or so. At the same time open a can of black beans and a can of diced tomatoes. Mix them together in a pot and stir in cumin. (I was out of coriander so I (obviously) left that out!) Turn the burner to medium and bring to a boil. (Tip: Gas stoves are wonderful. Gas provides instant heat unlike electric. As the microwave was beeping, the mixture was bubbling!) Place the potato(es) on a plate. Slice with a butter knife. Squish with your fingers! (Caution! It's hot hot hot!!) Ladle a scoop of beans and tomatoes on top of the potato(es). Add cilantro and voila! Eat up! (No sour cream for me! YUCK!) Enjoy! This can be eaten alone or as part of a dish. I enjoy it with a side of tofu and another of green beans! Happy cooking!
Tuesday, January 12, 2010
Avoiding GMO's
I'm a huge advocate for knowing what's in my food. I rarely buy processed, pre-packaged foods. I would much rather make it myself. And with that said, I always have to keep reminding myself that many food manufacturers are just for-profit companies; they don't care about individuals' health. They care about their bottom line.
GMO's are genetically modified organisms that are created in a lab. I don't think we fully know the dangers of GMO's, but the possibilities are too high. As always more research is needed. For me the potential dangers are enough for me to avoid them. (Specifically as a dietitian, I question the role of GMOs/GE or GM foods and their role in increased incidences of food allergies and intolerances. And this is just one potential issue that arises from GMOs! I could go on about the risk of cancers or unexplained anomalies!)
This brings me to my surprise find the other day! In my usual adventures of linking through various websites, I came across the NON-GMO Shopping list! I think it is GREAT! There are quick 4 steps listed. 1. Buy organic. (Check.) 2. Look for 'Non-GMO' labels. (Check.) 3. Avoid at-risk ingredients (Double Check! FYI This includes the oh-so popular soy, corn, canola oil, cotton seed oil, and sugar!) 4. (Make your life easy and) Use the above shopping guide! It is 16 pages long. Scan through it and print what you think you'd find useful to have with you while grocery shopping! (I'm also a fan of saving a tree; no need to print the entire handout unless you find it will be immensely useful! :)) Happy GMO-free shopping!
Saturday, January 9, 2010
Honesty is the Best Policy
I was reading January 2010's issue of Real Simple and thought I'd share something I chuckled at.
Q: What will you do differently this year? It has been said that the definition of insanity is doing the same thing over and over and expecting different results. Don't be a repeat offender! (One reader's response as follows.)
A: Nothing! I'll continue to get serious about my diet starting Monday, then blow it the first time I have dinner with the girls. I'll buy shoes I don't need, the dress I won't wear, and the workout videos I won't use. I'll continue to drink too much coffee and eat too many French fries. I'll live for today, forget the past, and make the same mistakes- and I will love every second of it, because my flaws make me!
I read this and smiled and laughed. SO true. Now perhaps that is not what you want to hear from me, but sometimes we all have to take a moment and smell those pretty flowers. Sometimes we all bend over backwards to please the many or perhaps the one, when sometimes the only one you should be pleasing is yourself! :) We all have flaws. We are all human. If we take a moment to love ourselves and realize our successes and failures, I believe it all works out in the end. Find the one thing you do enjoy. Return the dress. Buy a jacket. Skip the video. Take a dance class with your partner. Whatever you do, do with a smile. Any kind of movement (hop, skip, or jump), is a step in the right direction! :)
Thursday, January 7, 2010
Not for the Kiddies Dessert
Awhile ago the Vegetarian Times listed a recipe entitled Marinated Oranges. I've been meaning to try it and didn't get around to it until very recently. Ever have those moments (often in the dead of winter) when you wish it was sunny and 80 degrees with low humidity. I think those moments hit most when I look out the window and see 12+ inches of snow on the ground. (Brrrr!) Well, I found one of the best and simplest recipes to bring me- for a moment- back to the fond memories of summer. This dessert reminds of all those summer days where I'm relaxing with friends in the sun sipping on sangria. Obviously, I'm not going to make sangria in the dead of winter, but I sure will make this dessert. A sprinkle of sugar and a splash of Grand Marnier provide me with a little bit of summer during these gloomy, cold winter days.
Of course I adapted the recipe just a little bit.
All you need are some oranges (I used two.)
<1 tbsp of sugar (more or less for your taste)
1-2 tbsp lemon juice (more or less for your taste)
3 tbsp grand marnier (more or less for your taste)
Peel the oranges.
Cut the oranges crosswise into 1/2 to 1 inch rounds.
I used a glass pie dish to place the oranges.
Spinkle with sugar, lemon juice, and grand marnier.
Refrigerate for at least 4 hours, rotating oranges at least once.
Enjoy!
Find original recipe here.
Once again I'm camera-less, but hopefully that will soon be resolved! There's a decent picture in the link above!
Wednesday, January 6, 2010
CSPI I love you!
The Center for Science in the Public Interest (CSPI) is an amazing non-profit group. I susbcribe to their monthly Nutrition Action Healthletter. It's great. You can sign up for it here!
The reason why I love CSPI more than ever these days is because they wrote the FDA a 158 page report on why our food labels are inadequate (and that's putting it nicely!) I know so many people who are beyond confused by the multiple labels that are allowed on our food packages.
Here's a brief snipet of what CSPI wrote to the FDA! And if you're up for reading it, here's the entire version. At the very least give the full report a scan; it's very interesting!
I hope sooner, rather than much later, I'll be seeing a useful update of our food and nutrition labels! Here's hoping to a change in 2010!!
Tuesday, January 5, 2010
Soup in a Bag!
My favorite, quick, easy-go-to soup is Manischewitz! (And FYI, it's kosher- a bonus for all you kosher folks! ;) Thanks Mrs. T for introducing me to this product!!) I always use the bagged varieties. You just dump the pack in boiling water and GO! :) Of course I always do two extra things, possibly three. I add extras to the mix. The latest mix I chose was the Hearty Bean Soup Mix. Unfortunately for me I didn't have any fresh veggies on hand (except lettuce. GASP! I blame the snow for my lack of well stocked produce!), so I couldn't add carrots, tomatoes, shallots, or whatever my heart desired. As I've mentioned before I like thick soups, so to this mix I just added my own (extra) lentils! Gotta love thick, viscous soups! (If I had extra veggies, the additional step would have included pureeing the cooked vegetables, again to make the soup heavier and thicker.) Last but not least, is the addition of seasonings about 2 hours after simmering. Of course, this bag comes with a sodium laden packet of flavors estimated at 660mg per cup with FIVE cups of soup per bag. YIKES! I might use a sprinkle of the packet- maybe- but in all likelihood I'll just scan the ingredient list for the spices and herbs included (which could consist of paprika, garlic, chili powder, cayenne pepper, black pepper, parsley) and use my own sans salt. High blood pressure here I DON'T come!! :) With the amount of hot spices used, be ready for a kick! A glass of low fat milk goes very nicely with this soup! Enjoy!
Of note, unfortunately my camera broke so I have no pictures to share. Like most people I know, I enjoy seeing a picture of a product before I try my hand at it myself. So since I can't provide that picture today, what I can say is that if you like beans, lentils and spicy food, then this recipe is for you!!
Of second note, I have not been paid to review this product!
Monday, January 4, 2010
Don't Forget Your Clutch!
I don't know about you, but I'm often forgetting my reusable bags when I make a trip to the grocery store. I have umpteen million in my apartment. I have another five or so in my car. Neither of these do me much good. (I live in a city; my car does a lot of sittin' pretty these days!) I then have to buy yet another reusable bag or (gasp!) settle for paper (or god-for-bid plastic for those stores that haven't realized this is 2010! Geez! :))
Lucky for me, my friends are always thinking about me! :) One of the neatest (yes neatest) gifts I received this holiday season was a bag in a bag. This little guy is small and compact and fits cozy in my purse. It's a reusable bag that zips into a small clutch-like pouch. He stays with me almost 24/7. (No, he doesn't sleep with me! And yes I'm referring to it as if it's my boyfriend. :)) And now any time I make an impromptu trip to the market, I'll always have a reusable bag with me! YAY! Goodbyeeeee Plastic!! Na na na na. Na na na na. Hey Hey Hey. Goodbye! :)
Sunday, January 3, 2010
In Change We Believe!
Continuing with the theme of New Year's Resolutions comes the idea and hope of change. Change can often times be scary, thwarting, and challenging as each of us individually has to accept all that entails changing. For some that is easy, for others it can be quite a task.
I recently read an amazing book entitled Who Moved My Cheese! This quick, short read tells a story about four characters and their ability to handle- or lack there of- change. The characters include two mice named Sniff and Scurry and two little people named Hem and Haw. The gist of the story is that we all have simple and complex parts of ourselves. We each need to be able to identify who we are (Sniff, Scurry, Hem or Haw) and use that to our advantage to be able handle and move along with change. Whether you apply the message from this book to your personal life, work, dietary habits, and/or healthy living is up to you! It's a cute story and at the very least it gets you thinking about how you can (easily) do things just a little bit better. Recognition is probably the first step! (Aka letting go of denial! :)) Happy reading!
Friday, January 1, 2010
Happy New Year 2010!!
It's a new year and with every new year comes resolutions. I like the idea of resolutions, but I dislike the tendency for them to be unrealistic. "I'm going to go to the gym everyday 7 days a week and lose 50 pounds!" Great! I love it! Buttttt, when is the last time you went to the gym? Last January?! So the reality is that you might start off strong, but you won't be able to keep yourself motivated to go 7 days a week. (I hate to be the bearer of bad news, but you know it's true.) So in these cases, why not just set something a little more realistic such as going to the gym 3 days a week. As time goes by and you're consistently going 3 days a week, then that's a good time to increase to 4 days a week. I would love to see new year's resolutions last for the entire year, not just the first two weeks!
My New Year's Resolution is to try my hand at cooking new cuisines such as Indian and Polish foods. Stay tuned and we'll both see how it turns out!
What are your (realistic, long term) New Year's Resolutions? I'd love to know everybody's goals! :)
My New Year's Resolution is to try my hand at cooking new cuisines such as Indian and Polish foods. Stay tuned and we'll both see how it turns out!
What are your (realistic, long term) New Year's Resolutions? I'd love to know everybody's goals! :)